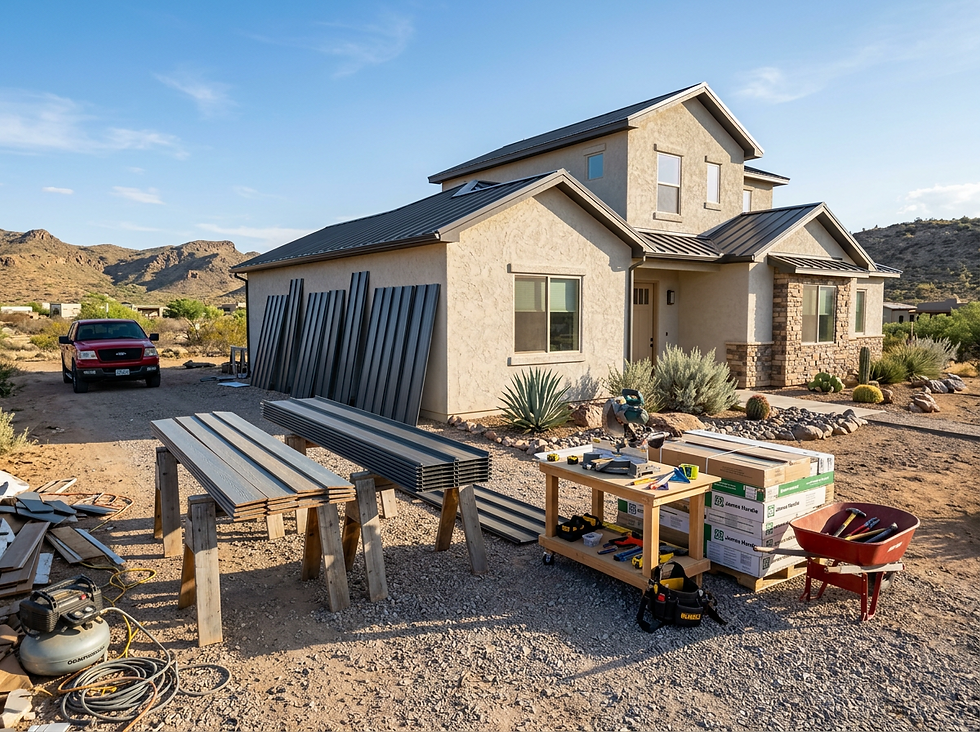
James Hardie Fiber Cement Repair Guide for Durable Low Maintenance Home Fixes
A cracked plank, loose corner, or chipped edge can make an otherwise solid exterior look neglected. The good news is that many fiber cement repairs are manageable with the right materials, patient prep, and careful cutting. James Hardie products are popular for these fixes because they are made to hold up against weather, pests, and everyday wear while keeping maintenance needs low.
This guide walks through the practical side of repair: how to inspect damage, when to patch, when to replace, what tools help, and how to get a clean, durable result.

Why James Hardie products work well for fiber cement repair
James Hardie is one of the best-known names in fiber cement exterior products. Homeowners often choose it for repairs because the material is built for long-term outdoor use and can blend well with existing siding when matched correctly.
Fiber cement is made from cement, sand, cellulose fibers, and water. That mix gives it a strong, stable feel without the rot problems that can affect wood. It also resists damage from insects, and it does not warp the way some materials can when exposed to heat.
For repair work, James Hardie products offer several practical benefits:
Durability in tough weather Fiber cement stands up well to sun, rain, wind, and changing temperatures when installed correctly.
Low maintenance It does not need frequent sealing like wood. Routine washing, paint touch-ups, and caulk checks usually handle most upkeep.
Good appearance options Lap siding, panels, trim, and soffit products make it easier to match the original design of the home.
Fire resistance Fiber cement is noncombustible, which can be a meaningful benefit in dry climates and wildfire-prone regions.
Stable repair results A properly fastened replacement board can sit flat and hold paint well when the surrounding wall assembly is sound.
In dry, sunny areas like Tucson, exterior materials face intense UV exposure and large temperature swings. Fiber cement can be a strong fit because it does not melt or soften in heat. Still, proper installation matters. Gaps, flashing, fasteners, and paint all play a role in how long the repair lasts.
A good repair is not just about hiding the damage. It needs to keep water out, hold its shape, and match the rest of the wall.
Inspect the damage before picking a repair method
Start with a slow inspection. A small crack may need only patching and paint. A broken, swollen, loose, or water-damaged board may need replacement.
Look for these signs:
Hairline cracks in one board
Chips at corners or butt joints
Loose boards that move when pressed
Softness behind the siding
Failed caulk at trim or penetrations
Rust stains near fasteners
Paint bubbling or flaking
Gaps where water can enter
If the damage is limited to the surface, patching may work. If the board is broken through, badly cracked, or no longer fastened well, replacement is usually the better choice.
Also check what caused the damage. A repair will not last if the source remains. Common causes include sprinkler overspray, poor drainage, missing flashing, impact from yard equipment, or fasteners driven too deeply.
If you uncover rot in the sheathing, active leaks, or widespread movement, stop and call a siding professional. Fiber cement repair is only as good as the wall behind it.

Gather the right tools and materials
The right setup makes the job safer and cleaner. Fiber cement is tough, and cutting it creates dust. Wear protective gear and follow the product manufacturer’s current instructions.
Basic tools and supplies may include:
Safety glasses
Work gloves
NIOSH-approved dust mask or respirator
Hearing protection
Tape measure
Pencil or chalk line
Utility knife
Pry bar
Hammer
Caulk gun
Putty knife
Drill or driver
Fiber cement shears or a circular saw with a fiber cement blade
Backer material, if needed for small patches
Exterior-grade patching compound approved for fiber cement
Paintable exterior caulk approved for fiber cement
Corrosion-resistant nails or screws
Replacement James Hardie board or trim
Primer and exterior paint, unless using prefinished material
Touch-up paint for small areas
For cutting, a dedicated fiber cement blade or shears helps reduce chipping. If you use a saw, cut outside when possible and control dust. Avoid breathing silica dust. Keep bystanders away from the cutting area.
For fastening, use corrosion-resistant fasteners that fit the product and exposure. Do not use drywall screws or random indoor fasteners. They can corrode or fail outdoors.
How to repair small cracks in fiber cement siding
Small cracks are common repair candidates. This method works best for hairline cracks or minor surface damage on an otherwise secure board.
1. Clean the repair area
Wash away dirt, chalky paint, and loose debris. Use a soft brush and mild cleaner if needed. Let the area dry fully before patching.
A clean surface helps patching compound bond. Do not apply filler over dust or peeling paint.
2. Check the crack depth
Press gently around the crack. If the board flexes, crumbles, or feels loose, patching may not be enough. If the board is solid, keep going.
3. Remove loose material
Use a utility knife or putty knife to scrape out loose edges. Do not gouge deeply. The goal is to create a clean surface, not widen the crack more than needed.
4. Apply approved patching compound
Use an exterior-grade patching compound suitable for fiber cement. Press it firmly into the crack with a putty knife. Slightly overfill the area so you can smooth it level.
Avoid ordinary interior spackle. It is not made for sun, rain, and exterior movement.
5. Smooth the patch
Feather the edges so the patch blends into the siding texture. If the siding has a woodgrain pattern, use light tool strokes to mimic the surrounding surface before the patch cures.
6. Let it cure
Follow the patch manufacturer’s drying time. Do not rush paint. Painting too soon can trap moisture and weaken the repair.
7. Prime and paint
If the patch requires primer, apply it first. Then paint the repaired area with a high-quality exterior paint. For the best appearance, paint the full board rather than only the patch.
A small spot touch-up can look different in sunlight, especially on older paint.
How to fix chips and damaged edges
Chips often happen near corners, bottom edges, and areas hit by tools or lawn equipment. A small chip can usually be filled.
Start by cleaning the area. Remove loose pieces. Apply patching compound in thin layers rather than one thick mound. Let each layer dry if the chip is deeper. Shape the final layer so it follows the original board edge.
For bottom edges, check clearance from soil, concrete, gravel, or roofing. Fiber cement products need proper clearance so moisture does not wick into the material. If the siding sits too close to grade or a hard surface, the same damage may return.

How to replace a damaged fiber cement board
If a board is cracked through, broken, badly warped, or loose from impact, replacement is usually the cleanest fix. This task takes more care because nearby boards can chip if forced.
1. Match the existing product
Before removal, measure the board exposure, thickness, texture, and profile. Bring a sample or clear photos to the supplier if needed. Matching the existing james hardie siding profile helps the repair blend in.
If the home has older siding, the exact product may not be available. In that case, a contractor can help choose the closest match or plan a larger section replacement.
2. Cut through caulk and paint lines
Use a sharp utility knife to score caulk at board ends, trim edges, and seams. This reduces paint tear-out when the damaged board comes free.
3. Loosen the damaged board
Slide a flat pry bar carefully behind the board. Work slowly from one end to the other. Do not pry hard in one spot. That can break adjacent boards.
If fasteners are hidden under the lap above, you may need to lift the upper board slightly to access them. Take your time.
4. Remove fasteners
Pull nails if you can. If not, cut them with an appropriate tool. Protect the surrounding siding from scratches and chips.
5. Remove the board
Once the fasteners are free, slide the damaged board out. Inspect the wall behind it. Look for wet sheathing, damaged housewrap, pest activity, or missing flashing.
If the weather barrier is torn, repair it before installing the new board.
6. Cut the replacement board
Measure twice, cut once. Leave the proper gap at butt joints, trim, and corners according to the product instructions. Use a fiber cement blade or shears.
Support the board while cutting. Long boards can crack if they hang unsupported.
7. Prime cut edges if required
Some products require sealing or priming field-cut edges. Follow the manufacturer’s instructions for the specific product and finish. This step helps protect exposed edges.
8. Install the new board
Slide the replacement into place. Keep the reveal consistent with nearby boards. Fasten it with approved corrosion-resistant fasteners.
Do not overdrive fasteners. The head should sit snug, not buried deep into the material.
9. Caulk the right joints
Use paintable exterior caulk approved for fiber cement where caulk is required, such as certain trim transitions. Do not caulk areas that need drainage or where the product instructions call for a different joint treatment.
10. Paint or touch up
Prime and paint as needed. If the surrounding wall has faded, painting a larger area may give a cleaner look than touching up one new board.
Techniques that make repairs last longer
Good repair work is often about small details. These tips help avoid common problems.
Keep water moving away from the wall. Adjust sprinklers so they do not spray siding. Check gutters, downspouts, and roof runoff.
Respect clearances. Siding should not sit directly against soil, patios, roof surfaces, or decks. Proper clearance helps prevent moisture damage.
Use compatible caulk. Choose high-quality, paintable exterior caulk made for siding and trim. Cheap caulk often cracks early.
Match fasteners to the job. Exterior-rated corrosion-resistant fasteners are a must. Coastal areas, desert sun, and seasonal storms are all hard on poor fasteners.
Cut cleanly. Use the right blade, support the board, and avoid rushed cuts. Chipped edges are harder to hide.
Paint with care. Fiber cement siding holds paint well when the surface is clean, dry, and properly prepared. Paint during suitable weather, not during extreme heat, rain, or dusty wind.
Protect yourself. Cutting fiber cement can create harmful dust. Use dust controls, wear proper protection, and follow safety guidance.
When to call a professional
Many small repairs are DIY-friendly. Larger repairs may be better handled by a siding contractor, especially when the problem involves water entry or several boards.
Call a pro if you see:
Widespread cracking across multiple walls
Soft or damaged sheathing
Repeated paint failure
Missing or incorrect flashing
Large sections pulling away
Damage near windows, roofs, or structural openings
Uncertainty about matching the product
A professional can also help preserve warranty coverage by following current installation requirements. If you are planning a larger exterior project in Southern Arizona, review local pricing factors with this guide to siding cost in Tucson.

Frequently asked questions
Can cracked James Hardie siding be repaired?
Yes, small surface cracks can often be patched with an exterior-grade product approved for fiber cement. A board that is cracked through, loose, or crumbling should usually be replaced.
Do I need special tools to cut fiber cement?
Yes, use fiber cement shears or a saw blade made for fiber cement. Standard wood blades can chip the material and create more dust. Always use proper dust protection.
Can I paint over a fiber cement repair?
Yes. Clean, dry, prime if needed, and use quality exterior paint. For the best color match, paint the entire repaired board or the full affected section.
How long does a fiber cement repair last?
A proper repair can last for many years when the underlying wall is sound, the product is installed correctly, and paint and caulk are maintained.
Should I use caulk on every siding joint?
No. Some joints need caulk, while others need clearance or joint flashing. Follow the current instructions for the specific product and location.
The bottom line on durable fiber cement repair
James Hardie products are a strong choice for fiber cement repair because they combine durability, good looks, and low maintenance. Small cracks and chips can often be patched with careful prep. Broken or loose boards usually need replacement with a matching product.
Take time to inspect the cause of the damage, use the right tools, protect yourself from dust, and follow manufacturer instructions. A clean repair should sit flat, shed water, blend with the surrounding wall, and reduce the need for repeat fixes.