


How Wind Driven Rain Causes Roof Vent Leaks and How Homeowners Can Prevent Them
A roof can stay perfectly dry through a straight-down rain, then leak during the next storm when the wind picks up. That is one reason roof vent leaks frustrate homeowners. The roof may look fine from the ground. The shingles may be in decent shape. The vent may even be installed correctly. Then a storm blows rain sideways, and water finds a path it would never take on a calm day.
Roof vents are necessary. They help plumbing systems breathe, remove moist air from bathrooms and kitchens, and ventilate attics. But every vent is also a roof penetration, which means it interrupts the continuous surface that sheds water. Good flashing and careful workmanship protect those openings. Wind-driven rain tests that protection.
This guide explains how wind-driven rain gets into roof vents, what homeowners can do to reduce the risk, why installation quality matters, and when it is time to call a roofer.

Why wind-driven rain is different from normal rain
Most roofing materials are designed around one basic idea: water should flow downhill. Shingles overlap from the ridge to the eaves. Flashing directs water over the next layer below it. Vent boots and metal flashings are made to shed water when gravity is doing the work.
Wind changes the rules.
When gusts push rain sideways or uphill, water can reach places that normally stay dry. Instead of running down the roof surface, water may be forced under vent caps, beneath loose shingles, against seams, or into tiny gaps around fasteners. A vent that performs well during a gentle storm can become vulnerable when rain is blown hard against it for several minutes or hours.
Wind-driven rain can affect roof vents in several ways:
It can push water under the lip of a vent cap.
It can drive water beneath lifted or poorly sealed shingles around a vent.
It can force water into gaps in cracked rubber pipe boots.
It can overwhelm vents that are near valleys, dormers, or areas with heavy runoff.
It can exploit small workmanship issues that do not show up during calmer weather.
This is why many homeowners notice roof vents leaking only after storms with strong wind. The leak may not appear during every rain. It may depend on wind direction, storm intensity, roof slope, and the condition of the vent assembly.
How roof vents are supposed to keep water out
Different vents use different designs, but most rely on the same basic principles: overlap, flashing, slope, and sealing where needed.
A typical roof vent has a visible upper part and a flashing base. The flashing sits under the shingles on the uphill side and over the shingles on the downhill side. This layered setup allows water to travel over the top of the flashing and continue down the roof.
Common roof vents include:
Vent type | What it does | Common leak points |
Plumbing vent pipe | Allows plumbing drain lines to vent | Cracked rubber boot, loose flashing, exposed nails |
Box vent | Releases attic heat and moisture | Wind-blown rain under the hood, poor shingle integration |
Ridge vent | Ventilates along the roof peak | Improper end caps, missing baffles, exposed fasteners |
Turbine vent | Uses wind to help exhaust attic air | Worn bearings, loose base flashing, wind-driven spray |
Exhaust vent cap | Vents a bath fan, kitchen fan, or dryer | Loose duct connection, blocked damper, poor roof flashing |
The flashing does most of the water-control work. Caulk or sealant may help in specific spots, but it should not be the main defense. A roof vent should not depend on a thick bead of caulk to stay dry.
That distinction matters. Sealant ages, cracks, and pulls away from metal, plastic, or shingles. Proper flashing uses the roof’s natural drainage pattern. Sealant supports the system, but it should not replace good installation.
How wind-driven rain gets into roof vents
Wind-driven rain does not need a large opening. A narrow gap, a lifted edge, or an aging gasket can be enough. Once water gets past the outer layer, it can travel along the underside of shingles, down a pipe, across a rafter, or through insulation before showing up inside the house.
Wind can push water upward under vent caps
Many roof vents are designed with hoods, louvers, screens, or raised caps. These features allow air to move while keeping most rain out. Under normal rain, they work well.
During strong wind, rain can blow at a low angle. It may hit the side of the vent rather than the top. If the vent opening faces the wind, water can be pushed past the cap or screen.
This is common with attic box vents and some exhaust vents. The leak may happen only when the wind comes from a certain direction. That is one clue that wind-driven rain is involved.
Wind can lift shingles around the vent
Shingles are not just decorative. They form overlapping layers that shed water. If shingles around a vent are curled, loose, poorly nailed, or not sealed, wind can lift them just enough for rain to get underneath.
Once water is under the shingles, it can reach the vent flashing. If the flashing was not integrated correctly, water may have a direct path into the roof deck opening.
This problem can worsen over time. Heat, UV exposure, and repeated storms can weaken the adhesive strips on shingles. In hot, sunny areas such as Tucson, rubber boots and sealants can age faster because of constant sun exposure.
Wind can expose small flashing flaws
A small flashing mistake may not leak during ordinary rain. Wind-driven rain is less forgiving.
Common flashing flaws include:
Flashing installed on top of shingles where it should be woven under them
Nails placed in areas where water flows
Exposed nail heads without proper sealing
Short flashing that does not extend far enough uphill
Metal flashing bent or distorted during installation
Gaps between the vent pipe and boot
Reused flashing that no longer sits flat
These problems may seem minor, but water under pressure can find them. A leaking roof vent often starts with one small weak point that becomes obvious only during severe weather.
Wind can create pressure inside the attic
High winds can change air pressure around the roof. As wind moves over and around the house, it can create areas of positive and negative pressure. That pressure can pull air through attic vents and, in some cases, draw fine rain mist along with it.
A well-designed vent system reduces this risk, but it cannot stop every drop of water in every storm. Some attic vents are made to resist wind-driven rain better than others. The best choice depends on the roof design, local weather, and the type of ventilation needed.

Proper flashing and workmanship make the biggest difference
Roof vents do not usually leak because vents are bad by default. They leak when water control fails. That failure often comes down to flashing, material condition, or workmanship.
A good roof vent installation should do several things:
Match the vent type to the roof material and slope
Use flashing sized correctly for the vent and roof pitch
Place the upper flashing beneath the shingles above it
Keep the lower flashing exposed so water drains over it
Avoid fasteners in exposed water channels when possible
Seal required fasteners with compatible materials
Keep the vent opening clean and correctly cut
Avoid relying on surface caulk as the main waterproofing method
Workmanship matters because roof systems are layered. Each layer has a job. If one layer sits in the wrong order, water can bypass the system.
For example, plumbing vent boots often fail when the rubber collar cracks around the pipe. But they can also leak if the flashing flange is installed incorrectly. The top and sides of the flange should be protected by shingles. The bottom should sit on top of the shingles so water exits onto the roof surface. If the entire flange is placed on top and then covered with sealant, it may look finished from the ground, but it is not properly integrated.
The same idea applies to metal vents, exhaust caps, and attic vents. Proper installation looks simple after it is done, but small choices make a big difference.
Sealant is not a long-term fix for bad flashing
Caulk has a place in roofing, but only a limited one. It can seal exposed fasteners, small manufacturer-approved joints, or certain terminations. It should not be used as a substitute for flashing.
A thick ring of roofing cement around a vent may stop a leak for a while. It can also crack, trap water, or hide the real problem. Once the sealant fails, the leak often returns.
A better repair usually means removing the surrounding shingles as needed, installing the correct boot or flashing, and rebuilding the shingle layers around it.
Why leaks can still happen even with correct installation
A properly installed roof vent is far less likely to leak, but no roof component is immune to extreme conditions. Wind-driven rain can create situations that exceed what a standard vent is built to handle.
This does not always mean the roofer did something wrong. Sometimes a leak happens because the weather found the limit of the system.
Storm direction can matter
A vent may resist rain from three directions and leak from the fourth. That is especially true for vents with side openings or louvers. If strong wind drives rain directly into an opening, some water may enter.
This type of leak can be hard to reproduce. A roof may stay dry through several storms, then leak during one storm with a rare wind direction.
Roof pitch affects water behavior
Low-slope roof areas are more vulnerable to wind-driven rain because water drains more slowly. On a steep roof, gravity helps water shed quickly. On a lower slope, water lingers and wind can push it sideways or backward.
Some vents also have minimum slope requirements. If a vent is used outside its recommended range, it may be more prone to leaks.
Materials age even when installed well
A vent boot that was installed correctly years ago can still fail. Rubber collars dry out and crack. Plastic vent parts become brittle. Metal flashing can corrode or loosen. Shingles lose granules and become less flexible.
In sunny desert climates, UV exposure and heat can speed up aging. A plumbing boot may look fine from the ground but have cracks around the pipe where water enters during wind-driven rain.
Debris can redirect water
Leaves, pine needles, dirt, and roofing granules can build up around vents. Debris can form a dam that slows drainage. During wind-driven rain, that trapped water may rise high enough to reach a seam or nail hole.
Even a small pile of debris on the uphill side of a vent can change how water flows.
Condensation can look like a roof leak
Not every drip near a vent comes from rain entering the roof. Exhaust ducts, attic moisture, and temperature differences can cause condensation. A bathroom fan duct that is loose, uninsulated, or venting into the attic can create moisture that appears after storms or humid weather.
This is why leak diagnosis matters. A roofer may need to distinguish between exterior water entry and moisture forming inside the roof assembly.
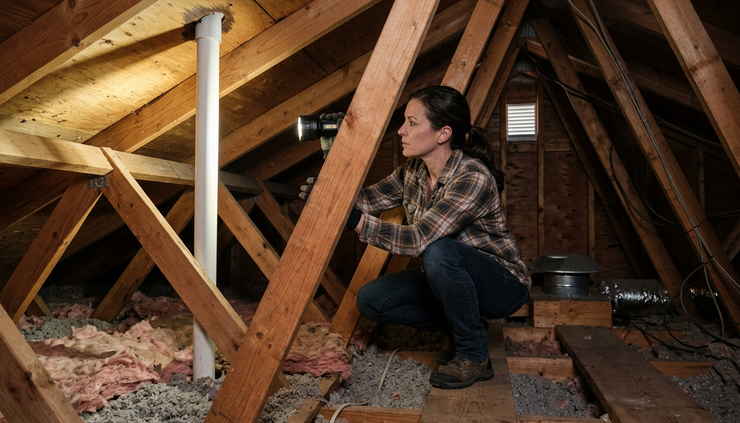
Preventive steps that reduce the risk of roof vent leaks
Homeowners cannot control the wind, but they can reduce the chances of water getting in. Prevention is mostly about keeping vents visible, keeping materials in good condition, and catching small problems before storms expose them.
Inspect vents from the ground after major storms
A simple visual check can reveal obvious problems. Use binoculars if needed. Avoid climbing on the roof unless you have the right equipment and experience.
Look for:
Missing, cracked, or lifted shingles near vents
Vent caps that look crooked or loose
Rust stains around metal vents
Cracked rubber collars around pipes
Piles of debris behind vents
Exposed nail heads
Sealant that is cracked or pulling away
If something looks different after a storm, take photos. Photos help track changes and give a roofer useful information.
Check the attic during or after rain
The attic often tells the truth before the ceiling does. If it is safe to access, inspect the underside of the roof deck after a storm.
Signs of a possible vent leak include:
Dark staining around a roof penetration
Damp insulation below a vent
Water trails on rafters or decking
Musty odor near one area
Rust on nails or metal ducting
Daylight showing around a vent opening
Be careful. Do not step between joists, touch electrical wiring, or inspect during lightning. If the attic is difficult to access, wait for a professional.
Keep roof areas clear of debris
Debris around a vent can trap moisture and redirect runoff. In areas with trees, clear leaves and needles from the roof, gutters, and valleys. If you live in a dry climate, dust and small debris can still collect behind vents and along roof transitions.
Debris removal should be done carefully. Aggressive scraping can damage shingles. Pressure washing is usually a bad idea for asphalt shingles because it can remove granules.
Replace aging vent boots before they fail
Plumbing vent boots are a common leak source. Many have rubber collars that seal around the pipe. Over time, the rubber cracks or separates.
If the boot is old, brittle, or visibly split, replacement is usually better than patching. Some repair collars can extend the life of a boot in certain cases, but they do not fix poor flashing or damaged surrounding shingles.
Make sure exhaust fans vent outside
Bathroom and kitchen fans should vent outdoors, not into the attic. A disconnected or poorly routed duct can dump moist air into the attic. That moisture can condense on the roof deck and mimic a leaking roof vent.
Check that ducts are connected, properly supported, and directed to an exterior vent cap. If the duct passes through an unconditioned attic, insulation may help reduce condensation.
Schedule roof inspections before storm season
A professional roof inspection can catch issues that are easy to miss from the ground. This is especially useful before seasons known for heavy wind and rain. In southern Arizona, for example, monsoon storms can bring sudden gusts and sideways rain that quickly reveal weak points around vents and flashing.
A roofer can check whether vent flashings are properly woven into the shingles, whether sealants have failed, and whether replacement is needed.
What homeowners should avoid doing
A roof leak can make anyone want a fast fix. Some quick fixes create bigger problems.
Avoid these common mistakes:
Do not smear roofing cement around every vent without finding the leak path.
Do not cover attic vents to keep rain out, since blocked ventilation can trap heat and moisture.
Do not ignore a small stain because it only appears during windy storms.
Do not walk on a wet or steep roof.
Do not assume the vent directly above the ceiling stain is the source.
Water can travel before it shows up indoors. A stain near a bathroom fan may come from a plumbing vent several feet away. A drip at a light fixture may come from a roof penetration uphill from it. Good diagnosis follows the water path, not just the visible stain.
How to identify whether a roof vent may be the source
Finding the source takes patience. Start with the timing, location, and storm conditions.
Ask these questions:
Did the leak appear only during heavy wind?
Was the wind blowing from a specific direction?
Is the ceiling stain near a bathroom, kitchen, or plumbing wall?
Is there a roof vent or pipe uphill from the stain?
Does the leak stop quickly after the storm, or does it continue dripping?
Is the attic wet near the vent or only near ductwork?
Are there visible cracks, rust, or loose materials around the vent?
A leak that appears only during wind-driven rain may point to a vent cap, flashing edge, lifted shingle, or wind-facing opening. A leak that happens during every rain may suggest a more direct flashing failure.
A steady drip around a plumbing pipe inside the attic could indicate a cracked boot. Damp insulation below an exhaust fan duct could suggest condensation or a disconnected duct. Rusty nails near a vent opening may point to repeated moisture.
When to call a roofer
Some homeowners can safely spot warning signs from the ground or attic, but roof vent repairs usually belong to a qualified roofer. Roof work involves fall risk, and poor repairs can make leaks worse.
Call a roofer when:
Water stains grow or return after storms
You see cracked vent boots or damaged flashing
Shingles near the vent are missing, curled, or lifted
The leak involves electrical fixtures
The roof is steep, high, wet, or difficult to access
Multiple vents show signs of aging
You suspect the leak is traveling from another area
A previous patch has failed
A roofer should inspect the vent, surrounding shingles, flashing integration, roof deck condition, and attic signs. The repair may involve replacing a boot, reinstalling flashing, replacing damaged shingles, sealing fasteners, improving ventilation, or upgrading the style of vent.
For homeowners in southern Arizona dealing with storm-related leaks, schedule a roof inspection with ABRC Tucson to have the vent, flashing, and surrounding roof area checked by a local roofing professional.

What a roofer looks for during a vent leak inspection
A professional inspection is more than a quick glance at the vent. Roofers look at how water would move across the entire area.
They may check:
Whether the vent is the right type for the roof
Whether the flashing is correctly layered with the shingles
Whether nails are exposed or placed in vulnerable areas
Whether the roof deck around the vent feels soft
Whether cracked sealant is hiding a larger issue
Whether nearby valleys or walls are sending extra water toward the vent
Whether the attic shows water staining, mold-like growth, or condensation
Whether ventilation is balanced between intake and exhaust
This matters because a visible vent leak can be a symptom rather than the root cause. For example, a valley uphill from the vent may channel heavy water toward the flashing. A loose shingle above the vent may allow water underneath. A blocked ridge vent may contribute to attic moisture that appears near other penetrations.
A roofer’s job is to separate these possibilities and recommend a repair that matches the cause.
Repair options for a leaking roof vent
The right repair depends on the vent type, roof age, and condition of the surrounding materials.
Common repairs include:
Replacing a plumbing vent boot
If the rubber collar is cracked or separated, the roofer may remove nearby shingles, replace the boot, and reinstall shingles around the new flashing. This is one of the more common roof vent repairs.
Reinstalling or replacing flashing
If flashing was installed incorrectly, adding caulk will not solve the problem for long. The roofer may need to remove shingles, reset the flashing in the correct order, and replace damaged shingles.
Sealing exposed fasteners
Some vent designs require exposed fasteners. Those fasteners need proper sealing with compatible materials. If the screws or nails have backed out, the roofer may replace them and seal them correctly.
Replacing damaged vent caps
A cracked, bent, rusted, or loose cap can let wind-driven rain enter. Replacement may be the best option, especially if the vent is old or poorly suited to the roof.
Improving duct connections
If the issue is condensation or a loose exhaust duct, the repair may involve reconnecting, insulating, or rerouting the duct. This is especially common with bathroom fans.
FAQ
Can wind-driven rain make a roof leak even if there is no leak during normal rain?
Yes. Wind can push water sideways or uphill into small openings that do not take on water during calm rain. This is common around vents, flashing edges, and lifted shingles.
Is caulk enough to fix a leaking roof vent?
Sometimes sealant helps with small details, but it is rarely a complete fix. If the flashing is


